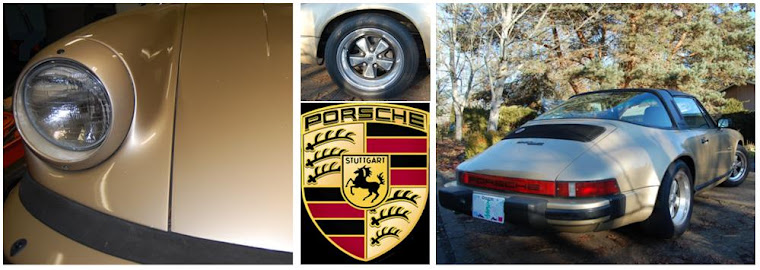
When I removed the gas tank from the car several months back, I discovered that the gas tank was used as part of the trunk enclosure, and a big hole would have to be sealed.
I cut a panel out of 18 gauge (1 mm) steel. The back of the panel had to be shaped with some persuasion from a hammer. The panel was then welded into place. I used a bright light from underneath to check for any pinhole openings.
Some primer and paint finishes the job. The underside is finished in primer and a high-build undercoat spray. This is the first sheet metal work I’ve ever done, and I’m glad it will not be very visible once the batteries are mounted in this space.
My controller arrived, and it is quite an impressive piece of hardware. It is 33 lbs (15 kg) of beautiful cast aluminum. The controller is rated for 300 kilowatts of continuous power (400 HP). I will not be pushing the limits of the controller, but it doesn’t hurt to oversize the controller and leave a little margin.
The controller will be mounted above the motor and is wired between the battery pack and the motor.
The controller’s job is to regulate how much of the battery pack voltage and current is sent to the motor, and to do so as efficiently as possible. Modern transistors are very efficient when they are fully on or fully off, but they tend to generate a lot of heat when they are partially on. The controller continuously connects and disconnects the motor to the battery pack. The switching speed is fast enough (8,000 cycles per second) that the motor does not react with a noticeable pulse each time the battery is connected and disconnected. The motor only “sees” an average voltage that depends on the how long the battery stays connected and how long the battery is disconnected within each switch cycle. For example, if the controller is on half the time, and off half the time, then the motor “sees” 50% of the battery voltage. If the controller stays on for 10% and off for 90% of each switch cycle, the motor will operate the same as if 10% of the full battery voltage were applied. The duty cycle is set by the position of the accelerator pedal.
Painting is one of the jobs I’ve been dreading on this project. I have nightmares about paint runs and drips. The engine compartment is covered in an adhesive that is left over from sound absorbing material that is long gone. I removed as much as I could with a wire brush and sand paper.
The car was masked off and painted with a spray can of touch up paint. It seems like spray can technology has improved over the years. The spray profile comes out in a fan pattern like a real spray gun, and it is much easier to control how much paint is going down to get uniform coverage.
The paint isn't perfect, but it is a lot better than before, and will be hidden by all of the EV components yet to be installed.
The motor mount bracket was welded, sanded, primed and painted.
The motor is ready for installation. This picture shows the four stock mounting points that are being re-used in the conversion.
There are four stock mounting locations on the car for mounting the motor and transmission. The mounting points utilize a hard rubber to isolate the car from motor vibration. They are engineered to take the twisting load of a motor under acceleration, so I would like to reuse the mounts for the electric conversion. I'm also reusing the stock cross bar to connect to the rear motor mounts.
I needed a way to locate how the rear cross bar is positioned relative to the electric motor. The geometry is important to ensure suspension travel and drive loads are the same as with the gas engine. Taking measurements on the gas motor proved to be difficult, so I made a jig that connects to the transmission mounting flange on the gas engine block, wraps around the engine, and bolts to the cross bar.
The jig is then mounted to the transmission flange on the electric motor adaptor plate. The cross bar is held in the correct position and I can connect the electric motor to the cross bar with a metal bracket.
To start on the bracket, I made a disk out of 1/4 inch (6 mm) steel plate to bolt to the end of the motor with 4 bolts on a 6 inch (150 mm) diameter, 90 degrees apart. I have never had good luck with precision drilling. I always end up drilling the clearance holes larger to account for placement error. This compromises the strength of the bracket because some bolts will be loaded more than others. I did some research and was able to place the holes very precisely using this technique: lay out the holes using a digital caliper. The first hole is marked by measuring off 3 inches from the center. The next hole is marked by scribing a line 3 inches from the center mark in the general location of where the second hole should be placed, and another line 4.243 inches from the first hole. The intersection of the two scribe lines marks the center of the second hole. All four holes are marked and double checked. Next, a center punch is used to make a small indentation into the metal surface at the center of each hole location. The first punch mark is made very lightly, and if the location is off a bit, a second strike, with the punch angled toward the correct location, can make a deeper pit closer to the correct location. A drill bit tends to “walk” when starting a hole on a flat surface. The punched dimples provide a little well that holds the drill tip in the correct position while the hole is drilled. The result was amazing. No need to enlarge the clearance holes.
I used 2 inch (50 mm) square tubing to span the gap to the cross bar. Some metal tabs were added to bolt the assembly to the cross bar. For now the parts are just tack welded, in case any adjustments are needed later.
In the lower left corner is an additional cross member that will be welded in between the two "L" brackets, once I test the fit, and fully welds all of the joints.
The motor and transmission were installed in the car. After checking the alignment, I will remove the parts, weld them up fully, and paint them.
Here is a video of the wheels spinning for the first time under electric power. The motor is connected to a 12 volt battery with jumper cables.
This is one of the major milestones of the project. I could not have completed this step without the help of my friend Pat, who is a talented joke teller and equally good machinist. Some of the parts I ordered needed modification, and with Pat’s help, we modified them to make everything fit together properly. Thanks Pat.
The goal is to build up the motor to make it look like the gas engine block. The important parts are the hub, which spins with the crank shaft, and the mounting flange for the transmission.
The first part to go on the motor is the taper lock bush. This piece has a slight taper, and as you bolt it together with the hub, the taper provides a clamping force that grips the motor shaft. This is one of the most secure ways to mount a hub to a shaft. I used a dial indicator to keep the face of the hub square to the motor shaft, as I tightened the mounting bolts (marked 1, 2, and 3 in the photo). Any error here will cause the flywheel to wobble and the vibration will be annoying and cause excessive wear in the drive train. I was able to get the wobble down to 0.003” (75 microns), and run out down to 0.002” (50 microns).
Next the adaptor plate is installed. This mechanically provides a surface to bolt the motor to the transmission.
The flywheel is bolted to the hub.
The clutch is centered on the flywheel with a special alignment tool.
Then the pressure plate is added. The clutch is squeezed between the flywheel and pressure plate, and transmits power from the motor to the transmission. When the clutch pedal is pressed, the pressure plate is pulled away from the clutch disk and the motor and transmission are de-coupled, making it easier to change gears.
Here is a video of the clutch spinning up:
The motor is then mated to the transmission.
Applying 12 volts to the motor spins the output shafts of the transmission:
Never waste the opportunity of using a project as an excuse to buy new tools. A lot of fabrication will be required making racks to hold all of the batteries I plan to use. I will also need to make a mount for the new motor. So, I purchased a MIG welder.
Welders join metal by heating the joint above the melting point of the metal. The heating is done by passing current across an air gap between the joint and the welder tip. An arc is formed, and as the sparks fly, some of the metal is vaporized. The welder replaces this with a filler metal. In the case of a MIG welder, the filler metal is a spool of wire fed through the tip of the welder. An inert gas is sprayed around the metal joint to protect the metal from oxidation while the metal is molten.
What is the first project to make with the welder? A welding cart of course. The goals of the cart are to make the welder mobile (the transformer in the welder is heavy), and to store all of the accessories in one location.
My 2 year old son is car crazy. He loves car shows (Disney's Cars, Top Gear), toy cars, and playing in the Porsche.
There are several activities going on in parallel with the car. They involve painting, water proofing and setting up a new welder so that I can make some of the car parts myself. Details will be coming soon.
A friend from Minnesota was in town and he wanted to take a look at the car. He asked a very important question, “Where are you going to put all of the batteries?” I’ve been wondering the same thing. I made a few drawings in Google Sketchup. I want to fit 86 cells into the car. Each cell is 5.59" x 2.64" x 8.58" (67 mm x 142 mm x 218 mm).
32 cells will fit on the sides of the motor – 16 on each side.
Another 20 cells can fit across the top of the motor. I need to leave room for the motor controller.
35 batteries can fit in the space at the front trunk where the gas tank once resided.
Once I get the motor and transmission mounted in the car I will make cardboard mock-ups of the batteries. After I finalize the placement, I will design the battery racks.