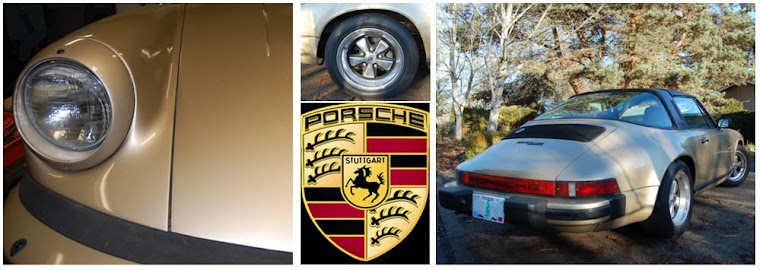
Removing the engine leaves behind some vestigial elements. The first is cosmetic, but the opening under the left side of the bumper for the exhaust pipe really bothered me.
I made a foam core fiberglass plug to fill the void. I reinforced the mounting location with a strip of plywood inset with t-nuts. The epoxy resin used to lay-up the fiberglass soaks into plywood and protects it from water and rot.
After primer, lots of sanding, factory match paint and clear coat,
the new plug is mounted on the frame I built for mounting the radiator.
The rear deck grill is vented for dumping engine waste heat and cooling the air conditioner condenser. The air conditioner was already removed before I got the car, and water and electricity don’t mix, so I need to seal that vent up. My first attempt to make a fiberglass tray failed miserably. I tried to make separate fiberglass parts using the deck lid opening and grill as molds. I lined the car parts with plastic wrap to serve as a mold release and keep the car clean. I used expanding foam to fill the voids. The part ended up being too bulky after gluing everything together. The epoxy didn’t sand down very well either. I keep the failed part on hand to remind myself to slow down, take a break, and start over if I find that the quality of my work is not good enough.
A second attempt worked much better. I glued up and carved a block made
of pink foam-board house insulation.
The trick to a smooth finished part
was to coat the foam with a mix of epoxy and a filler called
micro-spheres. The filler with spheres is easy to sand, and the mixture
doesn’t weigh as much as straight epoxy. Once the core is smooth and
sanded to the correct shape, fiberglass cloth and epoxy layup gives a
light and strong part.
Finished with primer and flat black paint, the
tray blends right in with the stock grill.
The last detail to
weatherize the motor compartment is an edge grip weather strip that
forms a seal with the deck lid. We get a lot of rain in the Pacific
Northwest. I’ve been driving the car daily for a while and everything is
staying dry in the back.
Saturday, November 15, 2014
Sunday, June 29, 2014
Oregon Wine Country
My family was in town. It was a chance to show off my electric car. What a proud moment it was for me to show my grandfather the project.
I always assumed I inherited my mechanical aptitude from my grandfather – he’s a carpenter and gave me some of my first tools. A few weeks ago I learned that an affinity for modifying cars is also shared. He told me about his 1931 Chevy Coupe that looked a little like this one:
He installed an Edelbrock four barrel carburetor and changed the gearing in the rear end to increase the top speed to 88 MPH. That was fast enough - I think the statute of limitations is up - to outrun the cops. It is funny that I never heard that story as a kid. All the good family stories are like that.
Even though I never opened it up all the way, cornering on wet pavement was sharp enough to give my grandpa the impression that my electric car is not slow. Going down the road with your butt 6 inches above the pavement helps with the perception of speed.
Later in the week, my Dad and I decided to go for a ride in the countryside and visit a couple of the local wineries. The total trip was about 70 miles and the car had plenty of range to spare.
In the hills near Dayton, Oregon at the vineyard of Domaine Drouhin.
One of the wineries, Sokol Blosser, had a new tasting room and was set up with several large photovoltaic arrays and an electric car charging station.
I didn't plug into the charger because I haven’t bothered to install a J1772 outlet on the car. I have plenty of range for my current driving needs and do all of my charging at home. If my driving habits change and I need to charge away from home, there are kits I can install to use these charging stations that are popping up all over.
The weather is really good, so we decided to take the top off the car for the ride home.
Monday, May 19, 2014
Controlling a Blower
I mounted a blower to force cooling air through the motor.
Blower and intake filter.
Motor and duct, viewed from below.
Now I need a way to control the blower. One option is to use a relay to turn the blower on when the ignition switch is turned on. Another way is to use a programmable speed controller to continuously vary the speed of the blower motor. Guess which option I used? Here is the speed controller:
I need to use a microcontroller to program the speed of the blower speed controller. A microcontroller is a small computer on a chip. It can read signals, do basic math and logic, output 0 to 5 volt signals, and tell time (really).
The Arduino is connected to the temperature sensor that comes built in to the WarP 9 motor. The sensor is a thermistor – a special resistor that changes resistance as the temperature changes. The Arduino measures the resistance of the thermistor, and I programmed a conversion routine to convert the resistance to temperature based on the curve provided by the thermistor manufacturer.
The Arduino compares the measured temperature to a target temperature – I selected 120 degrees F as my target – to determine the required fan speed. I’m using a feedback control loop, called PID. The Arduino sends a signal to the blower speed controller.
I also connected one of my dash gauges to the Arduino. The gauge once displayed oil level, but now will be displaying motor temperature. The Arduino sets the output signal to the transistor to set the gauge needle based on the measured motor temperature.
My friend Ryan is converting a Volkswagen Beetle to electric. He is going to rig up a similar motor blower for his project. So we took over the kitchen, honed our soldering skills, and turned our ideas into reality.
I call the result “The Octopus” because there are eight bundles of wires going everywhere.
I installed the system and took a few test drives to see how everything is working. I plotted motor temperature and blower fan speed for a 15 minute drive. About 5 minutes into the drive, the motor temperature reached 120 degrees F. I programmed the system to wait until blower program speed is at 40% before turning on the blower. The blower doesn’t push much air below this speed. After the 15 minute drive, I let the car sit with the blower running to see how long it would take to cool down. I had been hoping for a little bit more cooling capacity. It looks like the blower will be turning at full speed once the motor reaches 120 degrees. The ambient air temperature that day was 90 degrees.
Blower and intake filter.
The motor screen on the commutator side is replaced with a solid band with duct flange.
Now I need a way to control the blower. One option is to use a relay to turn the blower on when the ignition switch is turned on. Another way is to use a programmable speed controller to continuously vary the speed of the blower motor. Guess which option I used? Here is the speed controller:
I need to use a microcontroller to program the speed of the blower speed controller. A microcontroller is a small computer on a chip. It can read signals, do basic math and logic, output 0 to 5 volt signals, and tell time (really).
The Arduino is connected to the temperature sensor that comes built in to the WarP 9 motor. The sensor is a thermistor – a special resistor that changes resistance as the temperature changes. The Arduino measures the resistance of the thermistor, and I programmed a conversion routine to convert the resistance to temperature based on the curve provided by the thermistor manufacturer.
The Arduino compares the measured temperature to a target temperature – I selected 120 degrees F as my target – to determine the required fan speed. I’m using a feedback control loop, called PID. The Arduino sends a signal to the blower speed controller.
I also connected one of my dash gauges to the Arduino. The gauge once displayed oil level, but now will be displaying motor temperature. The Arduino sets the output signal to the transistor to set the gauge needle based on the measured motor temperature.
My friend Ryan is converting a Volkswagen Beetle to electric. He is going to rig up a similar motor blower for his project. So we took over the kitchen, honed our soldering skills, and turned our ideas into reality.
I call the result “The Octopus” because there are eight bundles of wires going everywhere.
I installed the system and took a few test drives to see how everything is working. I plotted motor temperature and blower fan speed for a 15 minute drive. About 5 minutes into the drive, the motor temperature reached 120 degrees F. I programmed the system to wait until blower program speed is at 40% before turning on the blower. The blower doesn’t push much air below this speed. After the 15 minute drive, I let the car sit with the blower running to see how long it would take to cool down. I had been hoping for a little bit more cooling capacity. It looks like the blower will be turning at full speed once the motor reaches 120 degrees. The ambient air temperature that day was 90 degrees.
Friday, May 9, 2014
Battery Management System - BMS
A battery management system is supposed to help manage the overall health of the battery pack. I have a Lithiumate Lite system by Elithion. Each cell in my pack gets a small circuit board that monitors voltage and temperature. Each board is connected to a master controller that is supposed to take action if any the cells are ever outside the safe voltage range of 2.5 to 3.38 volts.
The BMS is also designed to maintain all of the cells at the same voltage, when the cells are fully charged, by bleeding off a little bit of charge from the cells with the highest voltage with a shunt resistor. The cells all have slightly different capacity, so they cannot all be at the same voltage all of the time. During discharge, the cells with smaller capacity will reach low voltage before cells with larger capacity. A pack that is at the same voltage when fully charged is top balanced.
Another common strategy is to make all of the cells have the same voltage when the cells are near empty. This is bottom balancing. Both options have advantages and drawbacks, and unless all of the cells have the exact same capacity and internal electrical properties, you can’t have a battery that is balanced when both full and empty. With a bottom balanced pack, cells survive better if you accidentally over-discharge your pack. However, during charging you have to be extra careful to avoid overcharging your cells. With a top balanced pack, the risks are switched – less problems charging the pack, but if you over-discharge, the first cells to reach the bottom can be damaged by cells that still have significant energy left.
I decided to disable the active balancing function of my BMS because the active balancing is performed during the charge cycle. The voltage of the cell during charging and discharging will vary quite a bit. You cannot tell how full a cell is by measuring the cell voltage, until the cell has settled for about 24 hours. The good news is that if you manually balance your cells slowly, they tend to stay balanced. I will keep an eye on my cells and see if this holds. So far after nine months, I have not seen any cell drift.
I lined the inside of my battery boxes with a 1/8" (3 mm) thick rubber exercise mat.
Each cell gets a small monitoring board that measures voltage and temperature for each cell.
The pack in the front is wired up. It took about 7 hours to install the cells and BMS. Working with 200 volts slows things down a bit.
I read a post about someone having communication problems with their BMS. After trying everything they could think of to fix the problem, they finally decided to remove the press-on Molex (bottom row) connectors that came with the BMS, and try the Wago 222 (top row) wire connectors to connect each of the cell boards, and that solved the problem. I really like the Wago connector. The wires are securely locked into place with a lever. About 1 in every 6 Molex connectors I pulled off my system released from the wire with very little effort.
Subscribe to:
Posts (Atom)