Header

Header
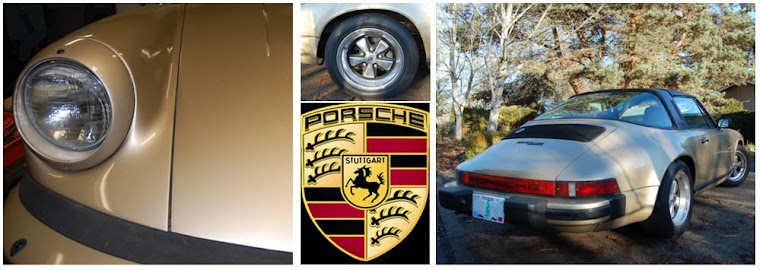
1983 Porsche 911 SC Targa

Sunday, April 27, 2014

Painting the Rear Battery Racks

There is a lot of road debris collecting in my motor compartment. Dirt, leaves, and pebbles have accumulated and I realize that a belly pan is not just for aerodynamics. I will need to figure out how to shield the rear motor compartment from the hazards of the road.


The rust I expected to see – after all there is bound to be some consequence to leaving bare metal to fend for itself in an automotive environment.


The rust cleaned up well with a bit of sanding and wire brushing.


Primer and paint always take a long time. Two coats of primer and two more layers of paint, with the work needing to be flipped to get to both sides, waiting for rain to let up, and masking for two colors means 8 days of waiting for paint to dry before I could get the boxes back into the car.


I struggled to come up with a better way to restrain my cells in the rack and failed to come up with anything better than nylon strapping. Cheap, non-conductive, strong, fast, easy… To prevent chaffing the strap, and to give the boxes a finished look, I found some metal reinforced plastic trim, and pushed it over raw edge of the battery box.


My upper rack holds 8 cells. To hold the cells securely I used draw latches.  I added some standoffs to mount an acrylic cover.  Welding is much easier if you remember to attach everything before the paint goes on.


The boxes blend in below the bumper line much better now that they are finished in flat black paint.

Saturday, April 19, 2014

Brushes and Motor Balance


I’ve been working on the car nearly every day for the last 5 weeks. I feel like I should have more to show. There are lots of small items in progress and I will report on them as I complete them.

To paint my battery racks (the front rack is done, the back racks are in progress), I’ve had to take a lot of components out of the car – 60 battery cells, the controller, wiring, and battery charger, not to mention the battery racks themselves. As long as the car was stripped down, I decided to inspect my motor, and it is a good thing I did. I was surprised to find that the brushes were very heavily worn down.

After doing a little bit of research, it turns out my motor shipped with H49 brushes. H49 are great at transmitting heavy electrical loads but they tend to wear very quickly. Perfect for a drag racing application, but not so good for street use. After 3,500 miles (5,600 km), my brushes were half the original length, or about 80% used up, because you can’t run the brushes all the way down to the embedded pigtail wires. I was expecting to go 50,000 miles (80,000 km) between brush replacements.

New H60 brush on the left. Old H49 brushes in the center and right. I'm not sure why there is uneven wear. A new brush is 1.5 inches (38 mm) long. 

Here is one of 4 brush holders, with a pair of brushes. The brushes are pressed against the commutator with coil springs.

The brushes have worn shallow grooves in the commutator. This is something I've seen reported by others with the H49 brushes.

I ordered a set of H60 brushes. The motor takes 8 brushes. These brushes are supposed to be better for street use. They are also supposed to be a little more efficient that the H49 brushes, reportedly around 10%. When new brushes are installed, even though they come preformed with a radius, only a small portion of the brush face is in direct contact with the commutator. The surface of the brush will eventually seat after several hours of run time. The motor will not be capable of full power until the brushes are seated. The motor was run on the bench with a 12 volt battery and charger for 32 hours to accelerate the seating process.

Also, while the motor was out of the car, I decided to address a small vibration from the motor. At 3,000 rpm I could feel a small vibration in the gear shift knob. The car didn’t vibrate and there was no audible indication of a problem. When I first pulled the gas engine, I took the flywheel to a machine shop for balancing. I should have also brought the clutch disk and pressure plate, to be balanced as an assembly. With just the flywheel, spinning the motor during my brush break-in procedure was vibration free. But when I bolted on the pressure plate, vibration was present above 2000 rpm. The motor spins at about 2400 rpm at 12 volts with no load. The vibration was easily solved by adding extra washers to the pressure plate bolts. Start with a single washer. If the vibration gets worse, move the washer to another position. Once you find the correct position to add mass, keep adding washers until the vibration is gone. I didn’t want a stack of washers all on one bolt. I ended up with one washer each on a grouping of three adjacent bolts. Vibration problem solved.

Thursday, April 10, 2014

Enhanced Cooling

The Soliton 1 controller can be air or water cooled. When air cooled, the 1000 amp rating of the controller is peak. With a proper cooling loop, the 1000 amp rating is continuous. In warm weather last summer, with air cooling, I experienced thermal cutback. On acceleration, the car feels low on power. A couple times, while climbing a long incline, I had to pull over for 5 minutes and let the fans cool the controller. I’m now installing a radiator, circulation pump, and reservoir for liquid cooling.

The WarP motor is also air cooled. It has an internal fan that spins with the main motor shaft. I try to operate the motor above 3,000 rpm to maintain a high flow of air through the motor, but the motor is the warmest component after a long drive.  I purchased an external blower to increase the flow of air, even when the motor is not spinning.
 I’m starting to run out of space to place all of my components. I also think that the radiator I purchased is oversized for the job. I determined that the cavity inside the rear bumper is just large enough to fit my cooling components.

 I started by bolting a few chunks of steel to attachment points on the car. Then I fit a couple of square tube rails parallel to the length of the bumper.


Finally, mounting tabs were added for all of the components: blower, circulation pump, and radiator.


 I'm going to try making a composite fiberglass plug that will fill the gap  under the bumper, where the tail pipe once lived.

The result of spending a week of evenings under the car:

Wednesday, April 9, 2014

100 Countries

I started the electric Porsche project in December of 2011 and from the beginning I've followed the traffic statistics for this site. I get a report on what keyword searches people used to reach my site, which post they most frequently visit, and the country in which they live.  The high water mark for web traffic, with 2,000 hits, occurred in June of 2013, when I took my first electric ride in the car. 


Just recently I've logged a visit from the 100th country and the honor goes to Mauritius.  It's pretty amazing to me that people, literally from around the world are reading about my project.  Just for fun, here is the list of all 100 countries, as recognized by the Google servers:


Antigua and Barbuda, Argentina, Armenia, Aruba, Australia, Austria, Bahrain, Bangladesh, Belarus, Belgium, Bolivia, Bosnia and Herzegovina, Brazil, Brunei, Bulgaria, Cambodia, Canada, China, Colombia, Costa Rica, Croatia, CuraƧao, Cyprus, Czech Republic, Denmark, Ecuador, Egypt, Estonia, Finland, France, Gabon, Georgia, Germany, Greece, Guadeloupe, Guyana, Hong Kong, Hungary, Iceland, India, Indonesia, Ireland, Italy, Jamaica, Japan, Jersey, Jordan, Kenya, Laos, Latvia, Lebanon, Liechtenstein, Lithuania, Luxembourg, Macau, Macedonia, Malaysia, Malta, Mauritius, Mexico, Moldova, Morocco, Mozambique, Namibia, Nepal, Netherlands, New Zealand, Norway, Pakistan, Philippines, Poland, Portugal, Qatar, Romania, Russia, Saudi Arabia, Serbia, Sierra Leone, Singapore, Slovakia, Slovenia, South Africa, South Korea, Spain, Sri Lanka, Sweden, Switzerland, Taiwan, Thailand, Trinidad and Tobago, Tunisia, Turkey, Uganda, Ukraine, United Arab Emirates, United Kingdom, United States, Venezuela, Vietnam, and Yemen.